I recently received a new request from a client who wanted additional notification functionality on the sales order screen. They manufacture items for their customers on a made-to-order basis. In the manufacturing process, every item must be sent off to a single vendor for the finishing step. Therefore, it is important for them to make sure that the vendor knows about all incoming sales orders and promise dates so they can plan accordingly. They wanted an action that would send an abbreviated sales order report off to that vendor. I will share with you how I did it.
In the early days of working with the Acumatica framework, I would have put something together that runs a report, gets a pdf as a byte array, and then attach it to a notification template (see ‘Running a Report’ and ‘Calling a notification template’ ). However, now one of my central design philosophies is to search high and low in the application to use existing functionality that does what I want.
To begin, let’s look at how Acumatica handles similar actions (user clicks an action, a report is run, and a notification template is called), such as “Email Sales Order” or “Email Quote”.
Looking at the code in the SalesOrderEntry graph, all notifications are driven off a single action named ‘Notification’. The Notification Source ID is passed into the action method to call different defined notifications. What makes this slightly tricky is the fact that the method body is protected, so it is not as simple as calling this method. Luckily, the xRP framework allows for these methods to be called from a graph extension.
Note the fact that the graph extension is marked as abstract, and the PXProtectedAccess attributes are tagged on both the graph extension and the abstract method. The abstract method exactly matches the signature of the protected member in the base graph. This will allow this graph extension to call the ‘Notification’ method the same way the “Email Sales Order” and “Email Quote” actions in the base graph call it.
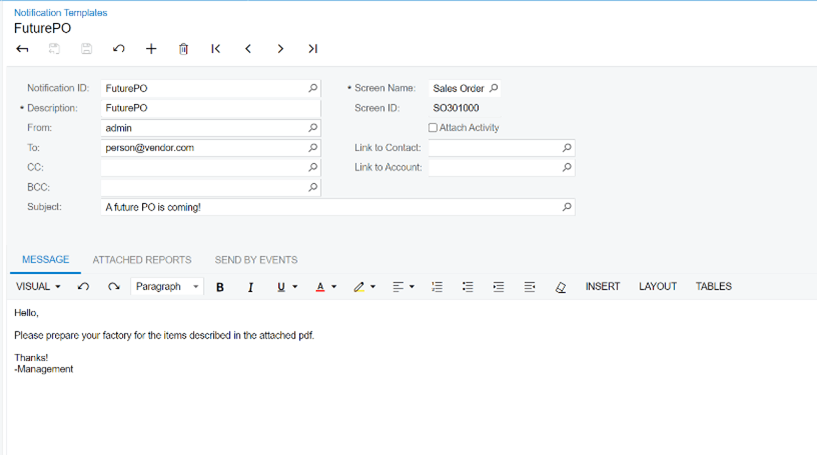
Next, we publish this code and configure the front-end to add the notification source. I created a FuturePO report (SOGP6410) that is essentially the sales order report with the pricing removed. Additionally, I created a notification template that should be called. The “FUTUREPO” (based on my protected const string ‘NotificationID’ in my graph extension) notification source is added to both Sales Order Preferences and my customer classes.
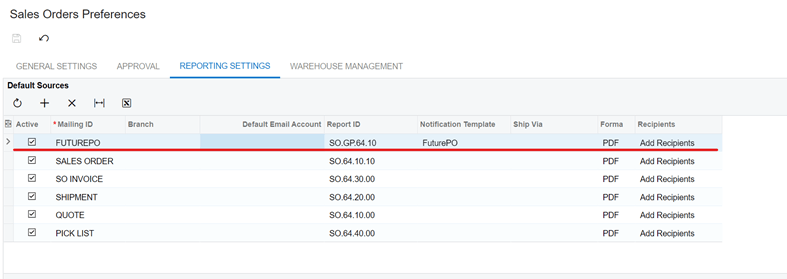
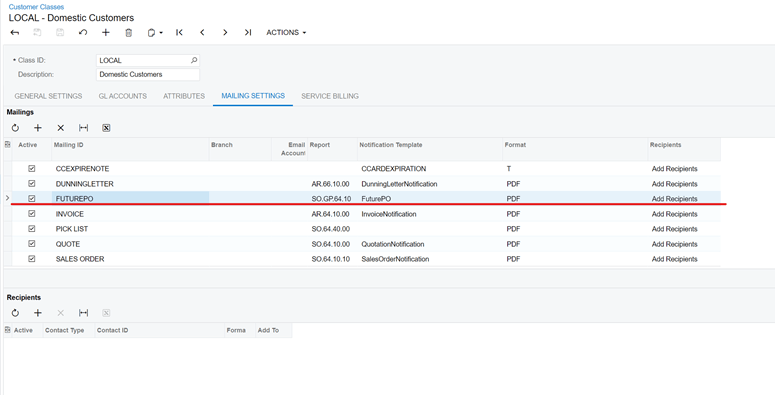
After completing the front-end configuration, when the action button is pressed, the report is run and the email is generated as expected.
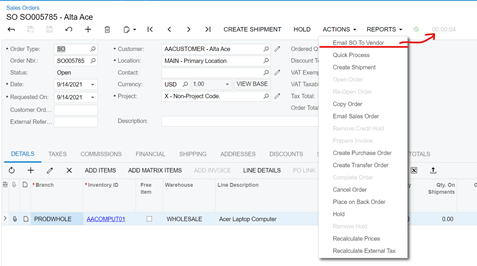

Custom notifications seem to be one of the biggest customization requests I get from my clients. Notifications such as these are a “low tech” sort of integration, where data is not being passed back and forth through APIs, but instead streamlined from human to human. They take only a relatively short time to set up and can make a massive difference in the visibility of different business processes.
I hope that this example helped you perhaps solve a challenge for yourself as an Acumatica user or for your client. Perhaps you will find that this is a great way of doing simple customization while leveraging the base platform code as much as possible.
In any event, I hope you found this useful, and as always, happy coding!
